
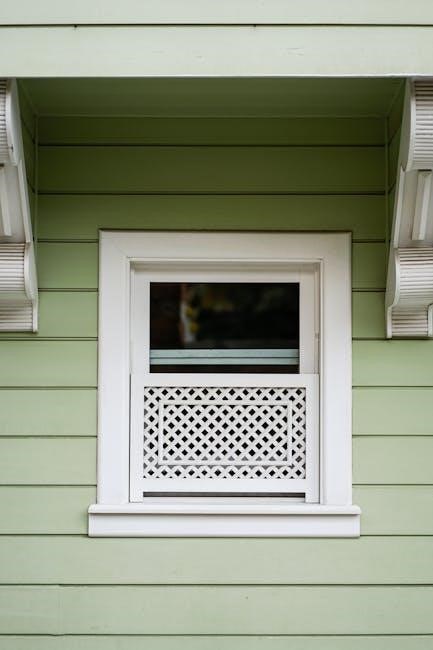
Hardie Plank cladding is a durable, low-maintenance fibre cement siding offering versatility and weather resistance; Proper installation ensures optimal performance, warranty validity, and enhanced curb appeal.
1.1 Overview of Hardie Plank Cladding
Hardie Plank cladding is a high-performance fibre cement siding designed for exterior walls. It offers durability, low maintenance, and resistance to weather, fire, and pests. Known for its versatility, it mimics wood grain textures while providing superior strength. Popular in millions of homes, it is engineered for long-lasting performance and aesthetic appeal. The product is available in various styles and finishes, making it a preferred choice for modern and traditional designs. Proper installation is critical to ensure its weather-tightness and structural integrity, adhering to manufacturer guidelines for cutting, flashing, and nailing.
1.2 Importance of Proper Installation
Proper installation of Hardie Plank cladding is essential for ensuring its durability and performance. Incorrect practices can lead to water damage, structural issues, and voided warranties. Adhering to manufacturer guidelines ensures weather-tightness, prevents moisture infiltration, and maintains the product’s aesthetic appeal. Proper techniques also enhance safety and extend the lifespan of the cladding. DIY enthusiasts and professionals must follow detailed instructions for substrate preparation, flashing, cutting, and nailing to achieve a secure and visually appealing installation that withstands environmental challenges and maintains the integrity of the building envelope. Quality installation is key to maximizing the benefits of Hardie Plank cladding.

Tools and Materials Needed
Essential tools and materials, such as saws, drills, screws, and weatherproof sealants, are required for a successful Hardie Plank cladding installation to ensure durability and safety.
2.1 Essential Tools for Installation
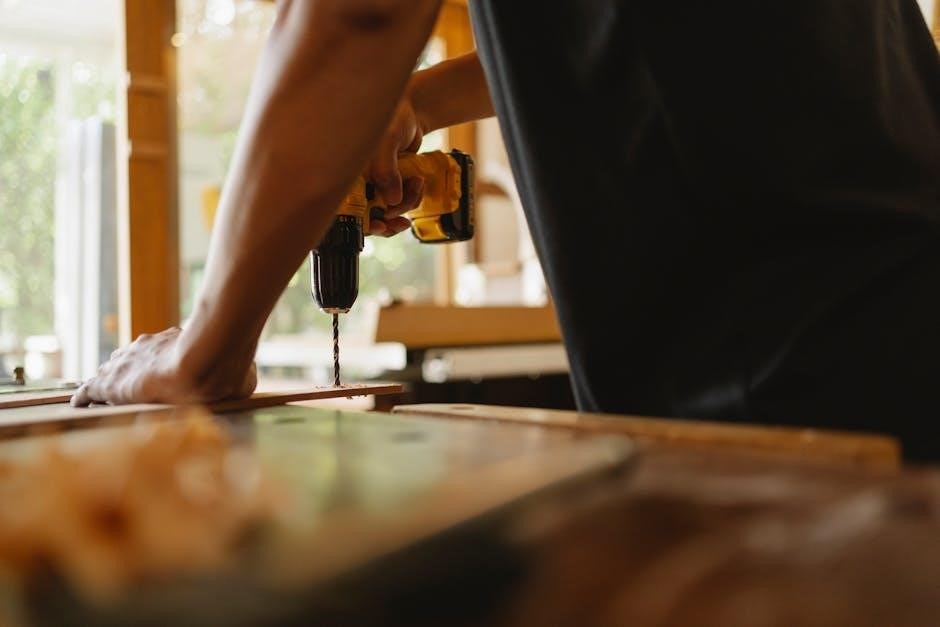
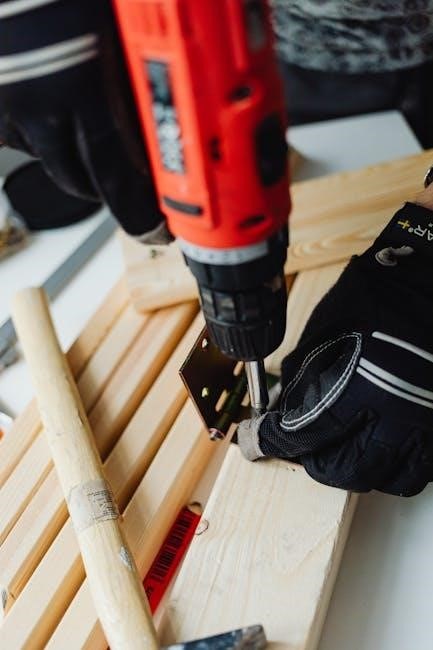
The installation of Hardie Plank cladding requires specific tools to ensure accuracy and safety. A circular saw or electric miter saw is necessary for cutting planks. Drill bits and screwdrivers are needed for pre-drilling and fastening. Utility knives can help trim planks when precision is required. Measuring tools, such as tape measures and levels, ensure proper alignment. Safety equipment, including gloves and goggles, protects during cutting and nailing. Nail guns or screwdrivers are used for securing planks, while weatherproof sealants and flashing tools are essential for sealing gaps and critical areas to prevent water damage.
2.2 Required Materials for Hardie Plank Cladding
Hardie Plank cladding installation requires specific materials for a successful project. Key components include fibre cement planks, starter strips, corner and joint trims, and flashing for weatherproofing. Weatherproof sealants and nails or screws designed for fibre cement are essential. Battens or furring strips may be needed to ensure a flat substrate. Additional materials like underlayment and vapour barriers can enhance durability, depending on local building codes. These materials ensure proper installation, structural integrity, and long-term performance of the cladding system.
2.3 Personal Protective Equipment (PPE)
Proper PPE is essential for safely installing Hardie Plank cladding. A dust mask or respirator is crucial when cutting fibre cement to avoid inhaling harmful particles. Safety glasses protect eyes from debris during nailing or cutting. Gloves prevent cuts and abrasions while handling planks. Steel-toe boots safeguard feet from heavy materials. Hearing protection is recommended when using power tools. Wearing long sleeves and pants can prevent skin irritation from cement dust. Ensuring PPE is worn throughout the installation process minimizes health risks and ensures compliance with safety standards.
Preparation
Prepare the substrate by ensuring it is clean, flat, and structurally sound. Apply flashing at critical areas like windows and doors to prevent water infiltration and damage.
3.1 Substrate Preparation
Ensure the substrate is clean, dry, and structurally sound. Check for any damage or unevenness and address it before installation. Remove old siding, dirt, or debris thoroughly. Verify the substrate is level and properly sheathed with materials like plywood or OSB. Ensure all surfaces are compatible with Hardie Plank cladding. Apply flashing at critical areas such as windows, doors, and corners to prevent water infiltration. Proper substrate preparation is crucial for a secure and durable installation, ensuring the cladding performs optimally and maintains its warranty.
3.2 Checking for Structural Integrity
Inspect the wall and framing for damage, rot, or structural weaknesses. Ensure the substrate is secure and capable of supporting the cladding system. Verify that all load-bearing elements are intact and properly aligned. Check for any gaps or uneven areas that could compromise installation. Address any issues before proceeding to ensure a stable base for Hardie Plank cladding. Proper structural integrity is essential for long-term durability and performance of the siding. Consult manufacturer guidelines for specific requirements and recommendations.
3.3 Cleaning the Substrate
Clean the substrate thoroughly before installing Hardie Plank cladding. Remove dirt, debris, old adhesives, and any loose material that could interfere with installation. Use a wire brush or pressure washer to ensure a smooth, even surface. Allow the substrate to dry completely, as moisture can compromise adhesion and lead to issues. A clean, dry surface ensures proper bonding and a secure fit for the cladding. This step is critical for achieving a durable and long-lasting installation. Always follow manufacturer recommendations for substrate preparation to maintain warranty validity and optimal performance.
3.4 Applying Flashing at Critical Areas
Apply flashing at critical areas such as windows, doors, corners, and joints to prevent water infiltration. Use compatible flashing materials and ensure they are securely fastened. Flashing should extend at least 15mm beyond the cladding edges for effective weatherproofing. Properly seal all gaps and overlaps with approved sealants. Flashing must be installed before cladding to ensure a watertight barrier. Follow manufacturer guidelines for placement and installation to maintain structural integrity and warranty compliance. This step is essential for protecting the building from moisture damage and ensuring the longevity of the Hardie Plank cladding system.
Installation Steps
Begin installation from the bottom, ensuring planks are aligned and securely nailed. Properly cut and fit around windows, doors, and electrical outlets for a seamless finish.
4.1 General Installation Tips
Ensure the substrate is clean, flat, and properly sheathed before starting. Begin installation from the bottom, aligning planks correctly. Use compatible fasteners and maintain recommended spacing. Apply flashing at critical areas like windows and doors to ensure weatherproofing. Carry planks on their edge to prevent damage. Follow manufacturer guidelines for cutting and nailing to avoid cracking. Ensure proper ventilation and alignment for a seamless finish. Refer to James Hardie’s installation manual for specific details to guarantee warranty compliance and optimal performance.
4.2 Starting the Installation from the Bottom
Begin installation by securing a starter strip at the bottom of the wall, ensuring it is level and aligned properly. This provides a foundation for the first row of planks. Install planks from the bottom up, fitting each snugly against the starter strip. Ensure planks are level and aligned with the starter strip for a uniform appearance. Use a level to verify alignment and a carpenter’s pencil to mark positions. Maintain the recommended spacing between planks and substrate for expansion. Properly securing the first row sets the stage for a successful installation. Always follow manufacturer guidelines for starter strip placement.
4.3 Aligning and Fitting Hardie Planks
Aligning and fitting Hardie Planks accurately is crucial for a professional finish. Start by ensuring the first plank is level and aligned with the starter strip. Use a spirit level to verify alignment and a pencil to mark the substrate for guidance. Fit each plank snugly against the previous one, maintaining the recommended overlap. Check each plank for levelness before securing it; Use hidden fasteners to avoid visible nails and ensure planks are evenly spaced. Proper alignment prevents gaps and misfits, ensuring a seamless exterior appearance. Always measure and cut planks slightly shorter for areas around windows and doors to avoid forcing them into place.
4.4 Cutting Hardie Planks
Cutting Hardie Planks requires precision and the right tools. Use a circular saw with a diamond-tipped or carbide blade for clean cuts. Always wear a dust mask and safety goggles to protect against dust and debris. Cut planks from the back side to minimize chipping. For curved cuts, a jigsaw with a fine-tooth blade is ideal. Score and snap for straight lines without power tools. Ensure cuts are smooth to maintain the product’s integrity and aesthetic appeal. Clean up edges with sandpaper to avoid rough surfaces.
4.5 Nailing Techniques
Proper nailing is critical for secure and durable Hardie Plank installation. Use 1.5-inch galvanized or stainless steel nails, spaced 400 mm apart for walls and 300 mm for corners. Fixings should be 15 mm from the plank edges to prevent splitting. For gun nailing, maintain a 30-degree angle, ensuring nails penetrate the substrate fully. Avoid overdriving, which can damage the plank surface. Hand nailing is recommended for precise control, especially around windows and doors. Always follow manufacturer guidelines to ensure structural integrity and warranty compliance.
4;6 Fitting Around Windows and Doors
Proper fitting around windows and doors is essential to ensure weatherproofing and a clean finish. Measure openings precisely and cut planks to fit snugly, leaving a 5-10 mm gap for expansion. Use flashings around these areas to prevent water infiltration, ensuring they are correctly sealed with compatible materials. Fix planks carefully, maintaining 15 mm from edges to avoid damage. For a seamless look, use joint trims at intersections. Always follow manufacturer guidelines to ensure proper sealing and structural integrity, preventing future issues like rot or water damage.
4.7 Handling Electrical Outlets and Pipes
When installing Hardie Plank cladding around electrical outlets and pipes, ensure proper sealing to maintain weatherproofing. Cut planks precisely, leaving a 5-10 mm gap for expansion. Use compatible flashing or sealants around these areas to prevent water infiltration. Secure the cladding with appropriate fixings, keeping them 15 mm from edges to avoid damage. After fitting, apply joint trims for a seamless look. Always follow manufacturer guidelines for specific materials and techniques to ensure durability and prevent future issues like water damage or rot. Proper installation ensures both functionality and aesthetic appeal.
4.8 Installing Corner and Joint Trims
Corner and joint trims are essential for a professional finish and to protect edges from weather damage. Measure and cut trims to fit seamlessly at corners and joints. Secure them using compatible fixings, ensuring they are 15 mm from edges to avoid splitting. Apply sealants at connections for weatherproofing. Align trims with Hardie Plank cladding for a cohesive look. Ensure accurate fits to prevent gaps and maintain structural integrity. Follow manufacturer guidelines for specific trim installation techniques to achieve a durable and visually appealing result. Properly installed trims enhance both functionality and aesthetics of the cladding system.

Finishing Touches
Finishing touches involve sealing gaps, applying paint, and conducting a final inspection to ensure durability and aesthetics, following manufacturer guidelines for a polished result.
5.1 Sealing Gaps and Joints
After installation, seal all gaps and joints with high-quality weatherproof sealant to prevent water infiltration and ensure airtightness. Apply sealant around windows, doors, and corners for maximum protection. Use a compatible silicone-based sealant that adheres well to fibre cement. Wipe away excess sealant immediately for a clean finish. Proper sealing improves energy efficiency and extends the lifespan of the cladding. Always follow manufacturer recommendations for best results.
5.2 Painting and Finishing
Hardie Plank cladding can be painted to match your desired aesthetic. Use high-quality exterior paint specifically designed for fibre cement surfaces. Ensure the cladding is clean, dry, and free from dust before painting. Apply a primer if recommended by the manufacturer for better adhesion and durability. Use a brush, roller, or spray gun for even coverage. Allow the first coat to dry completely before applying a second coat. Always follow the manufacturer’s instructions for paint selection and application. Proper painting enhances the appearance and protects the cladding from weathering. Regular touch-ups maintain its vibrant look and longevity.
5.3 Final Inspection and Touch-ups
After installation, conduct a thorough inspection to ensure all Hardie Plank cladding is properly aligned, secured, and free from damage. Check for any gaps or misaligned planks and address them promptly. Verify that all nails are correctly placed and spaced as per manufacturer guidelines. Touch up any scratches or chips with matching paint. Ensure all joints and corners are sealed and watertight. Document the installation for warranty purposes and perform final cleaning to remove any debris or dust. This step ensures a flawless finish, protects the cladding, and maintains its durability and aesthetic appeal for years to come.

Common Mistakes to Avoid
Common errors include improper flashing, incorrect nailing, misaligned planks, and ignoring manufacturer instructions. These mistakes can compromise durability, weatherproofing, and warranty validity, leading to costly repairs.
6.1 Improper Flashing and Weatherproofing
Improper flashing at windows, doors, and corners can lead to water infiltration and structural damage. Ensure flashing is installed correctly to maintain weatherproofing and prevent moisture-related issues. Always follow manufacturer guidelines for flashing placement and sealing to avoid compromising the cladding’s integrity. Neglecting this step can result in costly repairs and void warranties. Proper flashing ensures long-term durability and protects against environmental elements, making it a critical aspect of Hardie Plank installation.
6.2 Incorrect Spacing and Alignment
Incorrect spacing and alignment of Hardie Plank cladding can compromise both functionality and aesthetics. Proper spacing ensures even expansion and contraction, while misalignment may lead to water infiltration or uneven wear. Always follow manufacturer guidelines for plank spacing and alignment. Use a level and chalk line to ensure planks are straight and evenly spaced. Improper alignment can create gaps, allowing moisture to penetrate and damage the substrate. Correct spacing also enhances the cladding’s appearance, ensuring a professional and polished finish. Double-check measurements and alignment during installation to avoid costly repairs and maintain the integrity of the cladding system.
6.3 Improper Cutting Techniques
Improper cutting techniques can weaken Hardie Plank cladding, leading to cracks, breaks, and compromised weather resistance. Always use a diamond-tipped saw blade or a high-quality carbide-tipped blade to prevent damage. Avoid using improper tools, as they may cause uneven cuts or splintering. Cutting planks while they are wet or without proper support can lead to inaccurate measurements and poor fitment. Incorrect scoring or snapping techniques may result in uneven edges or weakened material. Improper cuts create vulnerabilities, allowing moisture infiltration and reducing the cladding’s durability. Always follow manufacturer instructions for cutting to ensure the integrity and longevity of the Hardie Plank system.
6.4 Incorrect Nailing Practices
Incorrect nailing practices can compromise the structural integrity and weatherproofing of Hardie Plank cladding. Using nails that are too short or too long, as well as improper spacing, can lead to warping, cracking, or uneven alignment. Over-nailing or under-nailing can cause stress points, reducing the cladding’s durability. Nails must be galvanized or stainless steel to prevent corrosion and ensure long-term performance. Always follow the manufacturer’s nailing pattern and spacing recommendations to avoid costly repairs. Proper nailing techniques are critical to maintaining the product’s warranty and ensuring a secure, weather-tight installation. Improper nailing can void the warranty and lead to premature deterioration of the cladding.
6.5 Not Following Manufacturer Instructions
Ignoring manufacturer guidelines can lead to installation failures, compromising the structural integrity and weather resistance of Hardie Plank cladding. Deviating from recommended practices, such as spacing, flashing, and nailing patterns, can result in water infiltration, warping, or uneven alignment. Failing to follow specific cutting, fitting, and sealing instructions can void the warranty and lead to premature deterioration. Always refer to James Hardie’s official installation manual for precise guidance. Proper adherence ensures a durable, secure, and aesthetically pleasing finish. Neglecting these steps risks costly repairs and undermines the product’s long-term performance and aesthetic appeal.
Maintenance and Upkeep
Regular cleaning, inspections, and prompt repairs ensure Hardie Plank cladding remains durable and visually appealing. Addressing issues early maintains its performance and extends its lifespan effectively.
7.1 Cleaning Hardie Plank Cladding
Regular cleaning prevents dirt buildup and maintains appearance. Use mild detergents, water, and a soft-bristle brush or garden hose with a spray nozzle on a low setting. Avoid harsh chemicals, abrasive materials, or high-pressure washes, which can damage the cladding. Inspect for mildew or mold, especially in shaded areas, and treat with a mildew-resistant detergent if necessary. Rinse thoroughly to remove residue. Cleaning should be done periodically, depending on exposure to weather and pollutants, to ensure long-term durability and aesthetic appeal. Proper maintenance ensures Hardie Plank cladding remains in excellent condition for years.
7.2 Regular Inspection and Repairs
Inspect Hardie Plank cladding annually to identify and address potential issues early. Look for cracks, gaps, or signs of wear around joints, windows, and doors. Check for loose or missing fasteners and repair or replace them promptly. Reseal any gaps with a high-quality exterior sealant to maintain weatherproofing. Address minor damage, such as chips or scratches, with touch-up paint to prevent further deterioration. Regular inspections and timely repairs ensure the cladding remains durable, maintains its appearance, and continues to protect the building from environmental elements, preserving its longevity and warranty validity.

Warranty and Compliance
Hardie Plank cladding comes with a manufacturer warranty covering material defects. Ensure compliance with local building codes and regulations for a valid warranty and safe installation.
8.1 Understanding Manufacturer Warranty
Hardie Plank cladding is backed by a manufacturer warranty, typically covering material defects for 10-15 years. Proper installation is essential for warranty validity. The warranty excludes issues arising from improper installation, weather damage, or poor maintenance. Always refer to the official James Hardie documentation for specific terms and conditions. Adhering to installation guidelines ensures coverage and long-term performance of the cladding. Warranty details vary by region, so consult local distributors for precise information. A valid warranty provides peace of mind and protects your investment in Hardie Plank cladding.
8.2 Compliance with Building Codes and Regulations
Hardie Plank cladding must comply with local building codes and regulations to ensure safety and structural integrity. Installers must verify regional requirements, including fire resistance, load-bearing capacity, and weatherproofing standards. Compliance ensures adherence to legal standards and prevents potential penalties. James Hardie provides technical documentation to assist with code compliance, but ultimate responsibility lies with the installer. Always check local authority guidelines before commencing installation. Compliance guarantees a safe, durable, and legally approved cladding system. Proper documentation and inspections are necessary to validate adherence to building codes and regulations.
Hardie Plank cladding offers durability and aesthetic appeal when installed correctly. Follow guidelines for a professional finish and long-lasting performance. Consult James Hardie resources for detailed support.
9.1 Summary of Key Installation Steps
Hardie Plank cladding installation requires precise steps for optimal results. Start with a clean, flat substrate and apply flashing at critical areas like windows and doors. Begin installation from the bottom, aligning planks securely. Use appropriate nailing techniques, ensuring fixings are 15mm from edges. Cut planks carefully with diamond-tipped tools. Fit planks around windows, doors, and electrical outlets neatly. Seal gaps and joints properly. Finish with painting if desired. Regular inspections and maintenance ensure longevity. Always adhere to manufacturer guidelines for warranty compliance and a professional finish.
9.2 Final Tips for a Successful Installation
For a flawless Hardie Plank cladding installation, ensure all substrate preparations and flashings are meticulously completed. Use recommended tools and follow cutting guidelines to prevent damage. Align planks accurately, maintaining proper spacing and nailing techniques. Double-check all fixings are 15mm from edges to avoid water ingress. Seal gaps and joints thoroughly for weatherproofing. After installation, inspect for any gaps or misalignments and address them promptly. Always refer to James Hardie’s official guidelines for specific details. Properly finishing and maintaining the cladding will ensure its durability and aesthetic appeal, providing long-term satisfaction and protecting your investment.
Additional Resources
Consult manufacturer installation guides and video tutorials for detailed instructions. Visit James Hardie’s official website for technical documentation and warranty information to ensure compliance and optimal results.
10.1 Manufacturer Installation Guides
Manufacturer installation guides provide detailed, step-by-step instructions for installing Hardie Plank cladding. Available on the James Hardie official website, these guides include diagrams, compliance tips, and best practices. They cover substrate preparation, flashing installation, and nailing techniques. Additionally, they offer tips for cutting, fitting, and sealing Hardie Plank boards. These guides are essential for both DIY enthusiasts and professionals, ensuring installations meet warranty and safety standards. They also emphasize the importance of following manufacturer recommendations for tools and materials. By adhering to these guidelines, installers can achieve a durable, weather-tight, and visually appealing exterior cladding system.
10.2 Video Tutorials and Demonstrations
Video tutorials and demonstrations are invaluable resources for mastering Hardie Plank cladding installation. Available on platforms like YouTube and the James Hardie website, these videos provide visual step-by-step guidance. They cover topics such as cutting, fitting, and nailing techniques, as well as tips for working around windows and doors. Animated tutorials also demonstrate proper flashing installation and weatherproofing methods. These resources are particularly useful for DIY enthusiasts and professionals seeking to refine their skills. By following these visual guides, installers can ensure a flawless, durable, and aesthetically pleasing cladding system that meets manufacturer standards and enhances the home’s exterior appeal.