
Aurus Mini Split Installation Manual: A Comprehensive Guide
This manual details the complete process for installing Aurus mini-split systems, covering everything from pre-installation planning to troubleshooting and long-term maintenance procedures.
Aurus mini split systems represent a modern approach to home climate control, offering ductless heating and cooling solutions designed for efficiency and comfort. These systems are gaining popularity as alternatives to traditional central air conditioning, providing zoned temperature control and reduced energy consumption. Unlike conventional systems, Aurus mini splits don’t require extensive ductwork, making them ideal for additions, renovations, or homes without existing duct systems.
They consist of an indoor unit and an outdoor compressor, connected by refrigerant lines and electrical wiring. Aurus systems are known for their quiet operation, advanced features, and ease of use. This manual provides a comprehensive guide to the installation process, ensuring a successful and reliable setup for years to come.
Benefits of Aurus Mini Split Systems
Aurus mini split systems offer a multitude of advantages over traditional HVAC options. Key benefits include significantly improved energy efficiency, leading to lower utility bills, and the ability to create customized comfort zones within your home through zoned heating and cooling. Installation is often simpler, avoiding disruptive ductwork installation and reducing renovation costs.
These systems also provide superior air quality, filtering dust, allergens, and other particles. Their quiet operation enhances living spaces, and their compact design allows for flexible placement. Furthermore, Aurus systems offer both heating and cooling capabilities in a single unit, providing year-round climate control and increased home value.
Safety Precautions Before Installation
Prior to commencing installation, strict adherence to safety guidelines is paramount. Always disconnect the main power supply before working with electrical components to prevent electric shock. Wear appropriate personal protective equipment (PPE), including safety glasses and gloves, during all stages of the process.
Refrigerant handling requires specialized knowledge; improper handling can cause frostbite or environmental damage. Ensure adequate ventilation when working with refrigerant lines. Confirm compliance with all local and national electrical codes. Incorrect operation due to ignored instructions can lead to system malfunction or personal injury. Consult a qualified technician if unsure about any aspect of the installation.

Pre-Installation Planning
Careful planning is crucial for a successful installation. This involves assessing your needs, selecting the correct unit, and gathering all necessary tools and materials.
Assessing Your Cooling and Heating Needs
Determining your specific cooling and heating requirements is the first step towards a comfortable and efficient system. Begin by calculating the square footage of the area you intend to condition. Consider factors like insulation quality, window size and orientation, and typical climate conditions.
Aurus mini-split systems offer zoned cooling and heating, allowing you to customize temperatures in individual rooms. Identify rooms with varying temperature needs – perhaps a sunroom requiring more cooling or a home office needing consistent warmth.
Evaluate existing heating and cooling systems; are they inefficient or unable to maintain consistent temperatures? Understanding these factors will guide you in selecting the appropriate BTU (British Thermal Unit) capacity for your Aurus unit, ensuring optimal performance and energy savings.
Choosing the Right Aurus Mini Split Unit
Selecting the correct Aurus mini-split unit hinges on your assessed cooling and heating needs. BTU capacity is crucial; a unit that’s too small won’t adequately cool or heat, while one that’s too large will cycle on and off frequently, reducing efficiency. Aurus offers a range of units with varying BTU ratings to match different room sizes.
Consider whether you need a single-zone or multi-zone system. Single-zone systems connect one indoor unit to one outdoor unit, ideal for conditioning a single room. Multi-zone systems allow multiple indoor units to connect to a single outdoor unit, providing zoned comfort throughout your home.
Evaluate features like inverter technology for energy savings and quiet operation. Aurus units often include advanced filtration systems to improve indoor air quality.
Tools and Materials Required for Installation
Successful Aurus mini-split installation demands specific tools and materials. Essential tools include a vacuum pump, manifold gauge set, flaring tool, tube cutter, wire strippers, screwdriver set, drill with various bits, and a level. Safety gear like gloves and eye protection are paramount.
Materials needed encompass refrigerant lines (copper tubing), insulation for the lines, electrical wiring, conduit, flare fittings, solder, nitrogen for leak testing, and mounting brackets. A condensate drain line and appropriate sealant are also crucial.
Depending on the installation, you might require core drilling equipment for wall penetration and potentially a lifting device for the outdoor unit. Always verify local codes regarding electrical and plumbing requirements.

Indoor Unit Installation
Proper indoor unit placement is key; secure mounting, careful refrigerant line connections, and correct electrical wiring are essential for optimal performance.
Mounting the Indoor Unit
Selecting a suitable location is paramount. Ensure ample space around the unit for airflow and maintenance. The wall must be strong enough to support the unit’s weight, potentially requiring wall studs or reinforced mounting brackets. Use a level to guarantee a perfectly horizontal installation, preventing drainage issues and operational inefficiencies.
Carefully mark and drill pilot holes, avoiding electrical wiring and plumbing. Securely attach the mounting bracket to the wall using appropriate screws and anchors. Gently lift the indoor unit onto the bracket, ensuring it locks into place correctly. Double-check the unit’s stability before proceeding to the next step. Incorrect mounting can lead to vibrations, noise, and potential damage.
Connecting the Refrigerant Lines
Proper refrigerant line connection is critical for system performance and longevity. Carefully align the refrigerant lines with the corresponding ports on the indoor unit, ensuring a tight and leak-proof seal. Use flared connections and appropriate tightening torque as specified in the manufacturer’s guidelines.
Avoid bending or kinking the lines during installation, as this can restrict refrigerant flow. Insulate the refrigerant lines to prevent heat gain or loss, maximizing efficiency. Regularly inspect connections for leaks using a refrigerant leak detector. Incorrect connections can lead to reduced cooling/heating capacity and potential compressor damage.
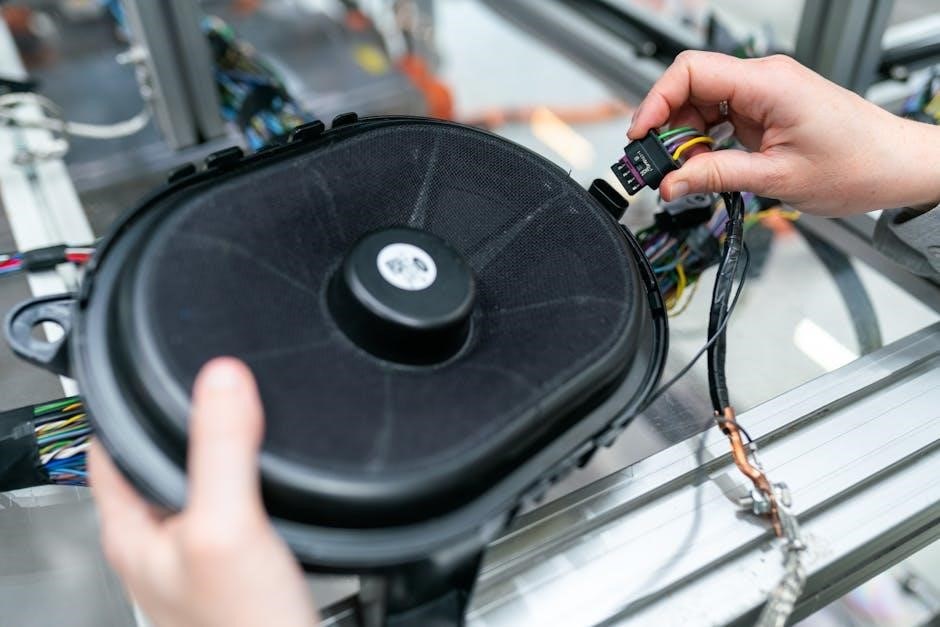
Electrical Connections for the Indoor Unit
Before making electrical connections, ensure the power supply matches the indoor unit’s voltage requirements. Use appropriately sized wiring and a dedicated circuit breaker for optimal safety and performance. Connect the power wires to the designated terminals, following the wiring diagram provided in the manual.
Proper grounding is essential to prevent electrical shock. Securely attach the ground wire to the grounding terminal. Double-check all connections for tightness and insulation. Incorrect wiring can cause malfunctions, damage the unit, or create a fire hazard; Always disconnect power before performing any electrical work.

Outdoor Unit Installation
Securely position the outdoor unit on a level surface, ensuring adequate airflow and protection from the elements for efficient operation and longevity.
Positioning the Outdoor Unit
Careful placement of the outdoor unit is crucial for optimal performance and longevity of your Aurus mini-split system. Select a location that provides ample unobstructed airflow, avoiding direct sunlight exposure during peak hours. Ensure at least 12 inches of clearance on all sides, and 18 inches above the unit, to facilitate proper ventilation.
The unit should be installed on a stable, level surface – a concrete pad is ideal – to minimize vibration and noise. Avoid areas prone to excessive dust, leaves, or snow accumulation. Consider proximity to the indoor unit when planning refrigerant line routing, minimizing bends and length. Protect the unit from potential damage, such as falling debris or accidental impact. Proper positioning significantly impacts efficiency and reduces potential maintenance issues.
Electrical Connections for the Outdoor Unit
Connecting the outdoor unit requires strict adherence to electrical codes and safety precautions. Before commencing, ensure the power supply matches the unit’s specifications, typically 220-240V. A dedicated circuit breaker is highly recommended; Use appropriately sized wiring, following local regulations, and install a disconnect switch near the unit for easy access during maintenance or emergencies.
Proper grounding is essential for safety. Connect the ground wire securely to the designated terminal on the unit. Double-check all connections for tightness and insulation. Incorrect wiring can cause malfunctions, damage the unit, or pose a safety hazard. If unsure, consult a qualified electrician. Always verify power is OFF before making any electrical connections.
Refrigerant Line Connection to the Outdoor Unit
Connecting the refrigerant lines to the outdoor unit demands precision to prevent leaks and ensure optimal system performance. Carefully align the flared ends of the refrigerant lines with the corresponding connections on the outdoor unit. Use two wrenches – one to hold the fitting on the unit and another to tighten the connection – to avoid twisting the lines.
Tighten the connections securely, but avoid over-tightening, which can damage the fittings. After tightening, thoroughly inspect all connections for any signs of leakage. Some units come pre-charged; others require charging after connection. Always follow the manufacturer’s instructions regarding refrigerant handling and charging procedures.

System Setup and Testing
Post-installation, a thorough system setup is crucial, including refrigerant line evacuation, precise refrigerant charging, and a comprehensive initial test run for verification.
Evacuating the Refrigerant Lines
Proper evacuation of the refrigerant lines is paramount to ensure optimal system performance and longevity. This process removes air and moisture, contaminants that can severely degrade cooling efficiency and potentially damage the compressor. Connect a vacuum pump, manifold gauge set, and appropriate hoses to the service ports on both the indoor and outdoor units.
Open both the high and low-side service valves, initiating the evacuation process. Run the vacuum pump for a minimum of 30-60 minutes, or until a deep vacuum of 500 microns or less is achieved, as indicated on the manifold gauge.
Crucially, maintain this vacuum level for an extended period to ensure complete removal of moisture. After achieving the target vacuum, close the valves and observe the gauge; any rise in pressure indicates a leak that must be addressed before proceeding. A successful evacuation is fundamental for a reliable and efficient Aurus mini-split system.
Charging the Refrigerant (If Necessary)
Most Aurus mini-split systems arrive with pre-charged refrigerant, eliminating the need for additional charging during standard installations. However, if refrigerant lines were disconnected or a leak was detected and repaired, charging becomes necessary. Consult the unit’s nameplate for the correct refrigerant type and quantity.
Using a manifold gauge set, carefully introduce the refrigerant into the low-side service port while the system is running. Monitor the superheat and subcooling values to ensure proper charge levels, referencing the manufacturer’s specifications.
Overcharging or undercharging can significantly reduce efficiency and potentially damage the compressor. Precise refrigerant charging is critical for optimal performance and longevity of your Aurus mini-split system. Always follow safety guidelines when handling refrigerant.
Initial System Test Run
After completing the installation and refrigerant charging (if applicable), perform a thorough system test run. Power on both the indoor and outdoor units and verify that the fan motors operate smoothly and at the correct speeds. Set the thermostat to cooling and then heating modes to confirm proper operation in both cycles.
Check for any unusual noises or vibrations from either unit. Monitor the supply and return air temperatures to ensure a sufficient temperature difference. Inspect all refrigerant line connections for leaks using a refrigerant leak detector.
Document all test results, including temperatures, pressures, and any observed issues. This documentation will be valuable for future maintenance and troubleshooting. A successful initial test run confirms a properly installed and functioning Aurus mini-split system.

Advanced Installation Considerations
Beyond basic setup, complex installations require careful attention to condensate drain lines, detailed wiring diagrams, and configurations for multi-zone systems.
Condensate Drain Line Installation
Proper condensate drain line installation is crucial to prevent water damage and ensure efficient operation of your Aurus mini-split system. The drain line must have a consistent downward slope, avoiding any sags where water could accumulate and potentially freeze. Use appropriately sized PVC pipe, typically ¾ inch, and secure it firmly with hangers every few feet.
Ensure the drain line terminates in a suitable location, such as a floor drain or outside, and is protected from freezing temperatures. Avoid connecting the drain line directly to the sewer system, as this can cause unpleasant odors. Consider installing a condensate pump if gravity drainage isn’t feasible. Regularly inspect the drain line for clogs and clear them promptly to maintain optimal performance.
Wiring Diagram Explanation
The Aurus mini-split wiring diagram is essential for correct and safe electrical connections. It details the power supply requirements, typically 220-240V, and the wiring configuration for both the indoor and outdoor units. Key components include the power cord, fan motor, compressor, and control board.
Carefully identify each wire’s function – live, neutral, and ground – before making any connections. Incorrect wiring can lead to system malfunction or electrical hazards. The diagram illustrates how to connect the communication wires between the indoor and outdoor units, enabling remote control functionality. Always adhere to local electrical codes and regulations, and if unsure, consult a qualified electrician.
Multi-Zone System Installation (If Applicable)
Aurus multi-zone systems allow connecting multiple indoor units to a single outdoor unit, offering customized temperature control in different areas. Installation requires careful planning to ensure adequate refrigerant flow and electrical capacity. Each indoor unit needs a dedicated refrigerant line connected to a distribution header linked to the outdoor unit.
Wiring becomes more complex, requiring a communication bus connecting all indoor units to the outdoor unit’s control board. Proper addressing of each indoor unit is crucial for individual control. Ensure the outdoor unit’s capacity matches the total cooling/heating load of all connected indoor units; Professional installation is highly recommended for multi-zone systems.

Troubleshooting Common Issues
This section provides guidance on diagnosing and resolving typical problems, including cooling/heating failures, error codes, and potential refrigerant leaks within your Aurus system.
Unit Not Cooling or Heating
If your Aurus mini-split isn’t providing cool or warm air, several factors could be at play. First, verify the unit is set to the correct mode – cooling or heating – and the thermostat is programmed appropriately. Check the air filters; a clogged filter restricts airflow, hindering performance.
Inspect the outdoor unit to ensure it’s free of obstructions like leaves or snow. Confirm the circuit breaker hasn’t tripped. If the issue persists, examine the refrigerant lines for any visible damage or ice buildup, indicating a potential leak. A malfunctioning compressor or fan motor could also be the culprit.
Consult the error code display (if applicable) for specific diagnostic information. If you’re uncomfortable performing these checks, contact a qualified HVAC technician for assistance.
Error Codes and Their Meanings
Aurus mini-split systems utilize error codes to diagnose internal issues, displayed on the indoor unit’s panel. Code “E1” typically indicates a sensor error, requiring professional inspection. “E2” often signals a fan motor malfunction, potentially needing replacement. “E3” suggests a refrigerant leak, demanding immediate attention from a qualified technician.
Code “E4” usually points to a communication error between the indoor and outdoor units. “E5” can signify a compressor issue, while “E6” may indicate overcurrent protection activation. Refer to the complete error code list in the appendix of this manual for a comprehensive understanding.
Ignoring error codes can lead to further damage. Always record the code before contacting Aurus support or scheduling a service appointment.
Refrigerant Leak Detection
Detecting refrigerant leaks is crucial for maintaining system efficiency and preventing environmental harm. Signs include reduced cooling/heating performance, hissing sounds near connections, and the presence of oil residue on refrigerant lines. A specialized electronic leak detector is the most reliable method for pinpointing leaks.
Never attempt to repair leaks yourself; refrigerant handling requires EPA certification. If a leak is suspected, immediately power off the unit and contact a qualified HVAC technician. They will use appropriate tools to locate and seal the leak, then recharge the system.
Regularly inspect refrigerant lines and connections during maintenance. Prompt leak detection minimizes refrigerant loss and ensures optimal system operation.
Maintenance and Care
Regular maintenance ensures optimal performance and longevity of your Aurus mini-split. This includes cleaning filters, coils, and scheduling annual professional inspections.
Cleaning the Air Filters
Maintaining clean air filters is crucial for the efficiency and air quality of your Aurus mini-split system. Dirty filters restrict airflow, forcing the unit to work harder and potentially leading to reduced cooling or heating performance, and even system failure.
Frequency of cleaning depends on usage and environmental conditions, but generally, filters should be checked monthly and cleaned or replaced every one to three months. To clean, gently remove the filters and vacuum them to remove loose dust and debris. For more thorough cleaning, wash the filters with mild soap and water, ensuring they are completely dry before reinstalling.
Always turn off the unit before accessing the filters. Refer to your Aurus mini-split’s specific model instructions for filter location and removal procedures, as designs can vary.
Coil Cleaning Procedures
Regular coil cleaning is essential for maintaining optimal performance and efficiency of your Aurus mini-split system. Over time, dust and debris accumulate on both the indoor evaporator coil and the outdoor condenser coil, hindering heat transfer. This results in reduced cooling/heating capacity and increased energy consumption.
Before cleaning, disconnect power to the unit. Use a commercially available coil cleaner specifically designed for HVAC systems, following the manufacturer’s instructions carefully. Gently apply the cleaner and allow it to sit for the recommended time, then rinse thoroughly with water.
Be careful not to bend the delicate fins on the coils. Professional cleaning is recommended annually for a comprehensive deep clean, ensuring longevity and peak performance.
Long-Term Maintenance Schedule
To ensure the longevity and efficient operation of your Aurus mini-split system, adhere to a consistent long-term maintenance schedule. Monthly, inspect and clean or replace air filters – a clogged filter drastically reduces performance. Quarterly, visually inspect refrigerant lines for damage or leaks and check condensate drain lines for blockages.
Annually, schedule a professional HVAC technician to perform a comprehensive system inspection, including coil cleaning, refrigerant level checks, and electrical component testing. This proactive approach prevents costly repairs and maximizes energy savings. Keep records of all maintenance performed for warranty purposes.
Following this schedule will help maintain optimal comfort and extend the lifespan of your Aurus mini-split investment.

Warranty Information
Aurus provides comprehensive warranties on its mini-split systems, covering parts and compressor functionality. Registration is required to activate full warranty benefits.
Aurus Mini Split Warranty Details
Aurus mini-split systems are backed by a robust warranty designed to provide peace of mind. The standard warranty covers defects in materials and workmanship for a specified period, typically one year for parts and five to seven years for the compressor, depending on the model. Extended warranty options are often available for purchase, increasing coverage duration.
Proper installation, performed by a qualified technician, is crucial for maintaining warranty validity. Failure to follow installation guidelines or perform regular maintenance may void the warranty. The warranty does not cover damage resulting from misuse, accidents, or unauthorized modifications. Detailed warranty terms and conditions are outlined in the official warranty document provided with the unit.
Registration Process
Registering your Aurus mini-split system is essential to activate the full warranty coverage and receive important product updates. The registration process is typically straightforward and can be completed online through the official Aurus website. You will need the unit’s model number, serial number, and proof of purchase – typically a receipt or invoice – to complete the registration.
Alternatively, a physical registration card may be included with the unit, allowing for mail-in registration. Accurate information is vital to ensure proper warranty activation and facilitate efficient customer support. Registering your system also allows Aurus to contact you regarding potential safety recalls or important service notifications.
Contacting Aurus Support
For any questions, concerns, or assistance regarding your Aurus mini-split system, their dedicated support team is readily available. The Aurus website provides a comprehensive support section, including frequently asked questions (FAQs), troubleshooting guides, and downloadable resources. You can typically find contact information, such as a phone number and email address, within this section.
Direct phone support offers immediate assistance for urgent issues, while email support allows for detailed inquiries with supporting documentation. Some manufacturers also offer live chat support for real-time assistance. Ensure you have your model and serial number available when contacting support to expedite the process.