Discover the convenience of sewing machine cabinet plans, featuring detailed DIY projects to organize your workspace. Enhance productivity with custom storage solutions and stylish designs.
1;1 Importance of a Sewing Machine Cabinet
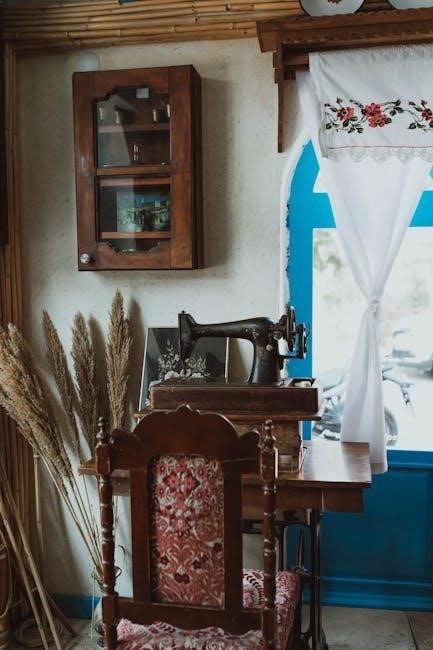
A sewing machine cabinet is essential for organizing your workspace, protecting your machine from dust, and enhancing productivity. It provides a dedicated area for sewing, keeping supplies within easy reach. Custom cabinets also offer space-saving solutions, ideal for small rooms. Additionally, they add a touch of style, complementing home décor while ensuring your machine remains safe and secure. By investing in a well-designed cabinet, you can maintain a clutter-free environment, focus on your projects, and enjoy a more efficient sewing experience. This makes a sewing machine cabinet a practical and valuable addition to any sewing room or craft area.
1.2 Benefits of DIY Sewing Machine Cabinet Plans
Embrace the flexibility and savings of DIY sewing machine cabinet plans. Customizable designs allow you to tailor the space to your specific needs, ensuring optimal organization and workflow. By building your own cabinet, you can save money compared to purchasing pre-made solutions. DIY projects also offer the freedom to choose materials and finishes, aligning the final product with your home decor. Additionally, DIY plans often include step-by-step guides, making the process accessible even for beginners. This approach not only enhances functionality but also adds a personal touch to your sewing area, creating a workspace that truly reflects your creativity and style.
1.3 Overview of PDF Plans Availability
PDF plans for sewing machine cabinets are widely available online, offering detailed instructions for DIY enthusiasts. These plans often include measurements, material lists, and step-by-step guides. Many PDFs are free, while others require purchase, ensuring a range of options for different skill levels. Some plans feature advanced designs, such as edge-banded plywood panels and interchangeable inserts for sewing machines. Reputable sources like Rockler provide comprehensive plans, including sewing machine lifts, which range from $140 to $500. Additionally, expandable sewing stations and companion cutting tables are popular choices, catering to quilters and crafters seeking versatile workspaces. These PDFs make it easy to create a custom sewing cabinet at home.

Materials and Tools Required
Gather plywood panels, lumber, pocket screws, and hardware. Essential tools include a drill, saw, and measuring tape. Source materials locally for convenience and cost-effectiveness.
2.1 List of Lumber and Hardware Needed
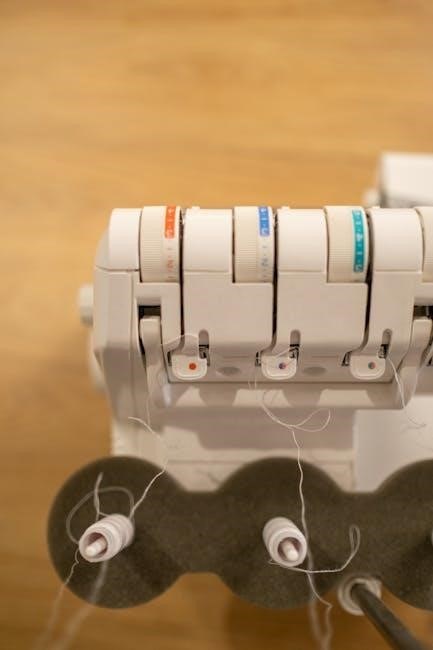
To build a sewing machine cabinet, you’ll need 2×4 lumber for the frame, 3/4-inch plywood for shelves, and MDF for smooth surfaces. Hardware includes hinges, drawer slides, and screws. Add edge banding for a polished look and consider pocket screws for sturdy joints. Sandpaper and wood glue are essential for finishing. Optional materials like casters or a sewing machine lift can enhance functionality. Ensure all materials are measured and cut to fit your specific design. Sourcing these locally or from hardware stores ensures convenience and cost-efficiency for your DIY project.
2.2 Essential Tools for the Project
To successfully build a sewing machine cabinet, gather essential tools like a table saw for cutting lumber, a drill press for precise holes, and an impact driver for screwing components. Sanding tools, such as a belt sander or orbital sander, ensure smooth surfaces. Clamps are vital for holding pieces during assembly. Measuring tools like a tape measure and square are critical for accuracy. A jigsaw or circular saw can be useful for curved or straight cuts. Safety gear, including goggles and a dust mask, protects during cutting and sanding. These tools will help you achieve professional results and ensure your project is both functional and durable.
2.3 Tips for Sourcing Materials Locally
When sourcing materials for your sewing machine cabinet, consider visiting local hardware stores or lumber yards for personalized service and competitive pricing. Online marketplaces like Craigslist or Facebook Marketplace often have suppliers offering quality materials at discounted rates. Additionally, check local classifieds or community boards for individuals selling unused lumber or hardware. Always inspect materials for quality before purchasing and negotiate prices when possible. Verifying measurements and specifications with suppliers ensures you receive the correct items. This approach not only supports local businesses but also helps you find unique or hard-to-find materials efficiently. It’s a great way to build your project sustainably and cost-effectively.
Design and Layout Considerations
Optimize your sewing space with custom layouts, ensuring your machine fits perfectly. Consider expandable work areas, interchangeable inserts, and ergonomic designs for maximum comfort and efficiency.
3.1 Measuring Your Sewing Machine
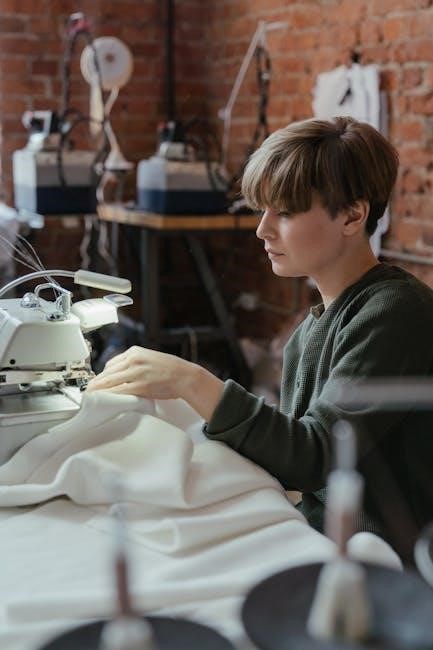
Measuring your sewing machine is crucial for designing a cabinet that fits perfectly. Start by recording the machine’s height, width, and depth. Consider the space needed for the sewing head and any attachments. Ensure accurate measurements to avoid a tight or oversized fit. Use a tape measure to capture precise dimensions, focusing on the machine’s footprint and any protruding elements. This step ensures the cabinet accommodates the machine seamlessly, allowing smooth operation and easy access. Proper measurement is key to a functional and aesthetically pleasing design, preventing costly adjustments later.
3.2 Space-Saving Design Ideas
Optimize your sewing space with clever design ideas. Consider foldable or drop-leaf extensions for an expandable workspace while maintaining a compact footprint. Built-in lifts allow your machine to rise to the perfect height, eliminating the need for a separate table. Vertical storage compartments can hold supplies like threads, fabrics, and notions, keeping them accessible yet out of the way. Incorporate multi-functional features like a recessed tray for small items or a sliding drawer for larger materials. These designs ensure efficiency and comfort, making the most of limited space while enhancing your sewing experience. Practical and stylish solutions for every sewer.
3.4 Incorporating Storage for Supplies
Maximize your sewing space by incorporating storage solutions into your cabinet design. Consider adding drawers, shelves, or bins to keep threads, needles, and fabrics organized. Custom inserts or small baskets can hold tiny accessories like buttons or safety pins. A drop leaf or foldable panel can provide extra workspace while keeping supplies hidden. Some plans include compartments specifically designed for sewing notions, ensuring everything is within reach. Edge-banded plywood panels can be used for smooth, durable surfaces, while pocket screws and biscuits ensure sturdy construction. These storage features not only enhance functionality but also contribute to a clutter-free, efficient sewing environment.

Construction Steps
Begin by assembling the cabinet box, then craft the table top with edge-banded plywood panels. Install a sewing machine lift and add a back leaf for extra workspace.
4.1 Building the Cabinet Box
Begin by cutting the plywood panels to the desired dimensions for the cabinet box. Assemble the sides and bottom using pocket screws, ensuring a sturdy frame. Attach the back panel and hardware for the sewing machine lift. Sand all edges for a smooth finish. Apply edge banding to cover raw plywood edges, enhancing the appearance. Once assembled, place the box into the table, aligning it securely. Ensure the box is flush with the table surface for a seamless fit. This step sets the foundation for the rest of the project, providing a stable and functional base for your sewing machine setup.
4.2 Assembling the Table Top
Assembling the table top involves aligning and securing the pre-cut plywood panels. Use edge banding to cover raw edges for a polished look. Apply wood glue and clamp the panels together, ensuring proper alignment. Insert biscuits into pre-drilled slots to reinforce the joints. Secure with pocket screws for added stability. Once the glue dries, sand the surface for a smooth finish. Attach the table top to the cabinet frame using wood screws, ensuring a flush fit. This step creates a sturdy, even surface for your sewing machine, enhancing both functionality and aesthetics. Proper clamping and alignment are critical for a professional result.
4.3 Installing the Sewing Machine Lift
Installing a sewing machine lift is a crucial step for functionality. Start by ensuring the lift mechanism is aligned with the machine’s dimensions. Securely mount the lift system inside the cabinet, following the manufacturer’s instructions. Test the lift to ensure smooth operation and proper height adjustment. Consider adding a custom insert to fit seamlessly around your machine, enhancing stability. For advanced setups, edge-banded plywood panels can provide a polished finish. Always prioritize safety by ensuring the lift is sturdy and properly integrated into the cabinet design. This feature will elevate your sewing experience, offering convenience and ergonomic benefits for extended projects.
Advanced Features and Customization
Elevate your sewing cabinet with edge-banded plywood panels, adjustable lifts, and custom inserts. These enhancements provide a polished look and tailored functionality for your sewing space.
5.1 Adding a Drop Leaf for Extended Workspace
A drop leaf design is a fantastic way to expand your sewing cabinet’s functionality. By incorporating a foldable extension, you can create additional workspace for larger projects like quilting or cutting fabric. This feature allows you to keep the cabinet compact when not in use while providing ample room when needed. The drop leaf can be constructed using edge-banded plywood panels for a smooth finish; Install hinges and supports to ensure stability and smooth operation. To enhance usability, consider adding storage compartments or a built-in cutting mat to the drop leaf. This practical addition transforms your sewing cabinet into a versatile workstation, perfect for crafters and quilters.
5.2 Incorporating Edge-Banded Plywood Panels
Incorporating edge-banded plywood panels into your sewing machine cabinet enhances both aesthetics and durability. This technique ensures smooth, finished edges that protect the plywood from damage. Edge banding is ideal for creating a professional-looking surface, especially when using plywood for shelves or tabletops. By applying edge bands, you can achieve a seamless look that complements the overall design. This method is particularly useful for DIY projects, as it simplifies the process of creating polished, high-quality finishes. Edge-banded panels also offer excellent durability, making them a practical choice for a sewing cabinet that will withstand frequent use and movement; This feature is a must for a long-lasting, professional-grade cabinet.
5.3 Customizing with Paint or Stain
Personalize your sewing machine cabinet with paint or stain to match your home decor. Sand surfaces smoothly before applying your chosen finish. Paint offers vibrant color options, while stain enhances the natural wood grain. Consider testing samples on scrap wood to ensure the desired look. For a professional touch, apply a clear sealant to protect the finish. Customization allows you to add a personal flair, making the cabinet a unique addition to your sewing space. This step transforms the functional design into a stylish piece that reflects your creativity and complements your room’s aesthetic.
Safety and Functionality Tips
Ensure proper ventilation to prevent dust buildup and maintain a safe working environment. Secure the cabinet to prevent tipping and enhance stability during use.
Regularly maintain your sewing machine to ensure optimal performance and longevity. These tips will help you create a safe and functional sewing space.
6.1 Ensuring Proper Ventilation
Proper ventilation is crucial for maintaining a comfortable and safe sewing environment. When building a sewing machine cabinet, incorporate features like vents or slats to allow airflow, preventing heat buildup from the machine. Ensure the cabinet is not entirely sealed, as this can lead to moisture accumulation and dust issues. Consider adding small gaps or mesh panels for ventilation without compromising storage. Additionally, placing the cabinet in a well-ventilated room or using a small fan nearby can enhance airflow. Proper ventilation not only protects your machine but also ensures a healthier workspace, reducing the risk of overheating and prolonging equipment lifespan.
6.2 Securing the Cabinet for Stability
Ensuring your sewing machine cabinet is stable is crucial for safety and functionality. Use sturdy materials like edge-banded plywood and secure all joints with pocket screws or biscuits. Install anti-tip brackets or anchor the cabinet to the wall to prevent tipping. Place the cabinet on a level surface and use adjustable feet if necessary. Additionally, ensure the sewing machine is properly mounted within the cabinet to minimize vibrations. A stable setup not only protects your machine but also enhances your sewing experience by providing a reliable workspace.
6.3 Maintaining the Sewing Machine
Regular maintenance ensures your sewing machine operates smoothly. Clean dust and lint from the machine, oil moving parts, and check thread tension. Replace needles periodically to prevent damage. Store the machine in a dry, cool place to avoid rust. Dust the cabinet regularly to keep it looking new. Follow the manufacturer’s guidelines for specific care instructions. Proper upkeep extends the life of your sewing machine and cabinet, ensuring optimal performance for years to come. Regularly inspect belts and gears for wear and tear. Lubricate according to the manual to maintain seamless functionality. A well-maintained setup enhances sewing efficiency and enjoyment.
Complete your sewing cabinet project with confidence, ensuring a functional and beautiful workspace. Final touches like paint or stain enhance aesthetics, making your DIY creation truly special.
7.1 Final Assembly and Inspection
After constructing all components, carefully assemble the cabinet, ensuring all parts align properly. Double-check the fit of the sewing machine lift and storage compartments. Inspect the entire structure for any gaps or misalignments. Verify that all hardware is securely fastened and the table top is level. Test the functionality of the lift mechanism to ensure smooth operation. Finally, inspect the finish for any imperfections and address them before final use. This step ensures your sewing machine cabinet is not only functional but also safe and visually appealing, ready to enhance your sewing experience.
7.2 Testing the Sewing Machine Setup
Once the cabinet is fully assembled, test the sewing machine setup to ensure smooth operation. Plug in the machine, align it properly, and check if it sits level. Verify the lift mechanism by raising and lowering the machine to confirm it moves effortlessly. Sew a test fabric to assess vibration and noise levels. Ensure the machine is securely fastened to the table and the surface is even. This step ensures optimal functionality, stability, and longevity of both the cabinet and sewing machine.

7.3 Troubleshooting Common Issues
When building a sewing machine cabinet, common issues may arise, such as uneven surfaces or misaligned drawers. Start by checking all measurements and ensuring proper alignment during assembly. If the sewing machine lift doesn’t function smoothly, inspect the mechanical components for obstructions or improper installation. For warped panels, apply heat or clamps to realign them. Ensure all screws and bolts are tightened securely to maintain stability. If the cabinet wobbles, adjust the leg levelers or add stabilizing pads. Regularly inspect the finish for scratches or damage and apply touch-ups as needed. Addressing these issues early ensures optimal functionality and longevity of your cabinet.